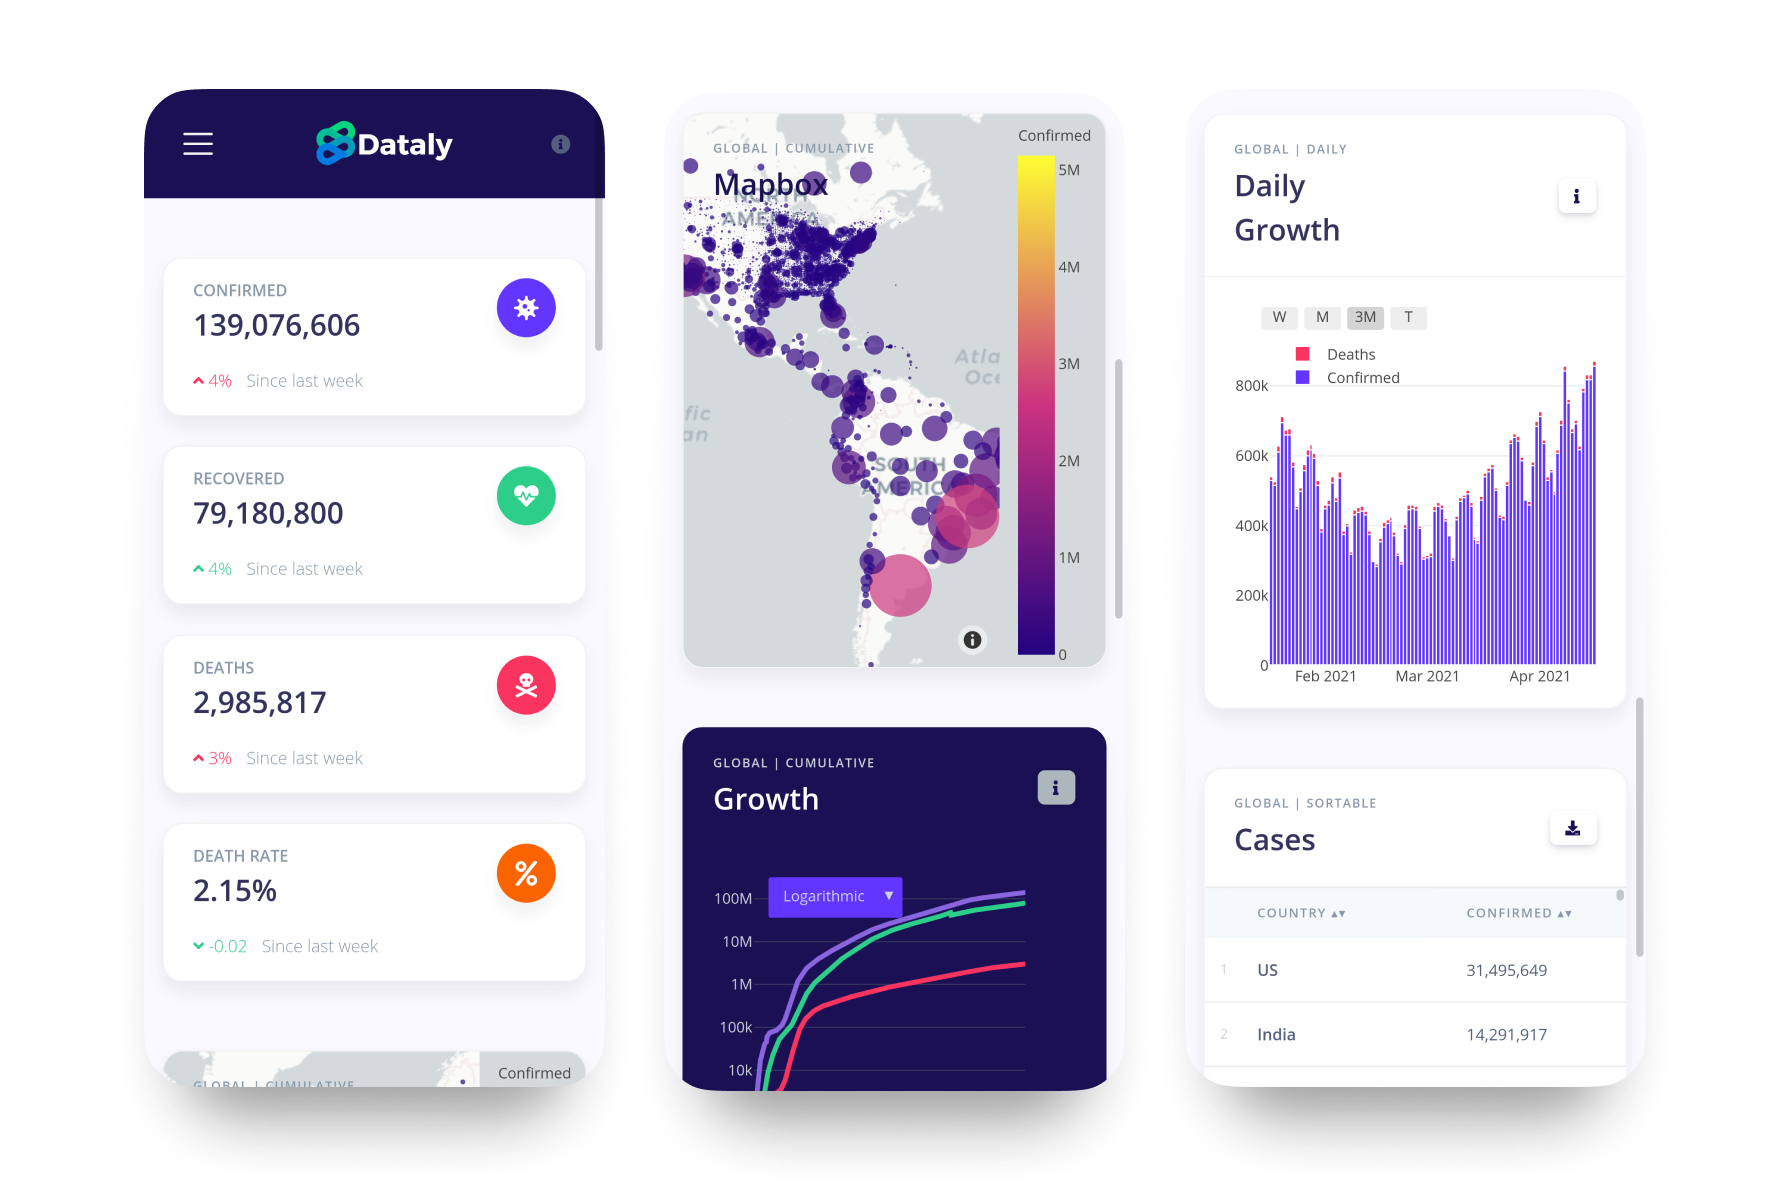
A powerful yet intuitive COVID-19 analytics dashboard, attracting thousands of users.
Coronavirus disease (COVID-19) is an infectious disease caused by a newly discovered coronavirus. At this time [May 2020], there are no specific vaccines or treatments for COVID-19. The best way to prevent and slow down transmission is be well informed about the COVID-19 virus. who.int
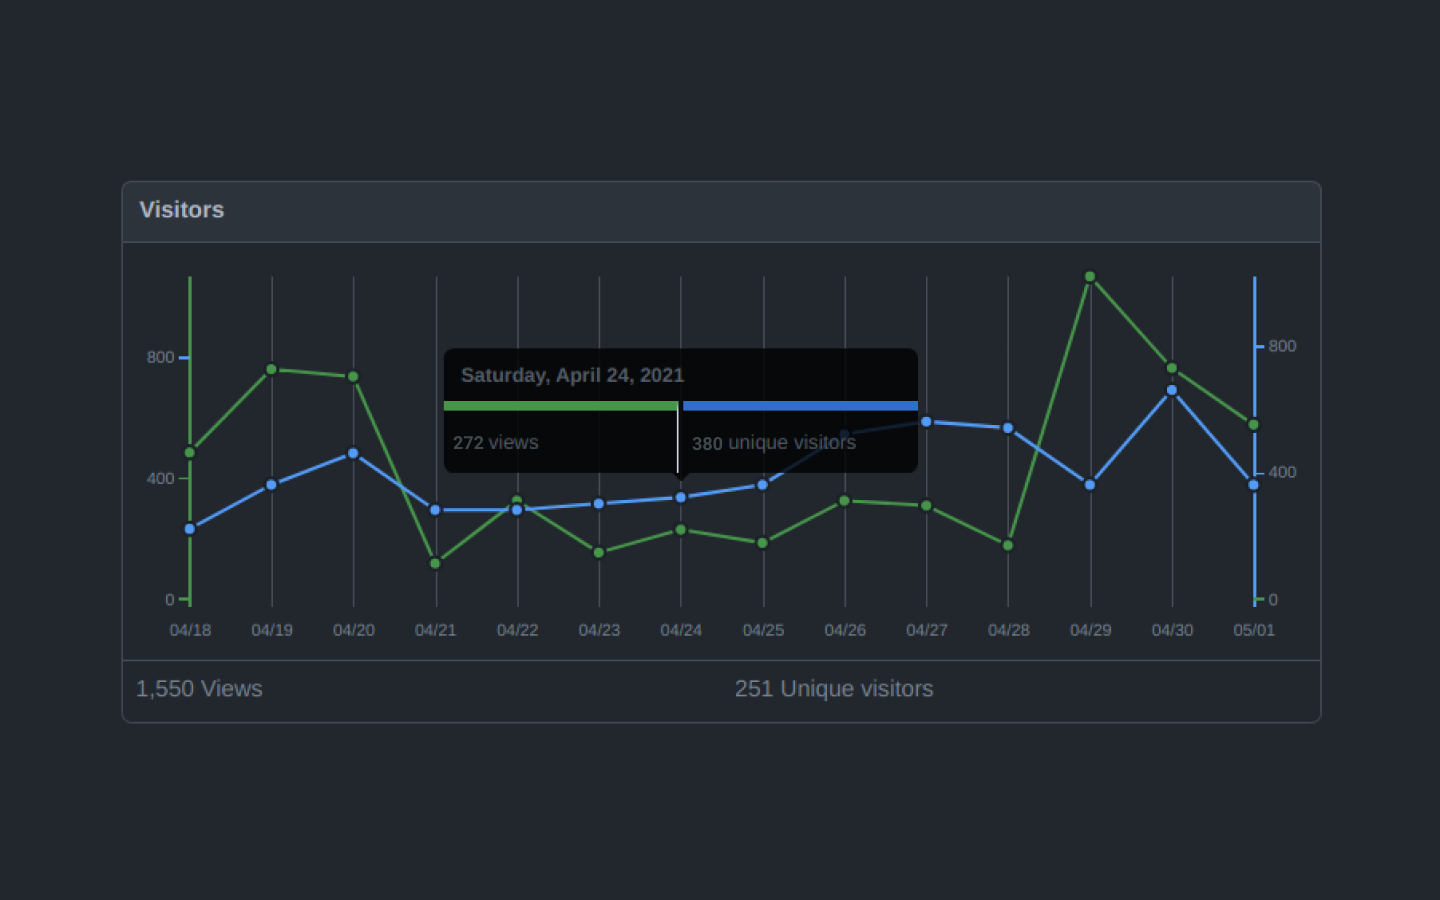
When I started this side project the goal of this project was not to add to the collection of existing COVID-19 dashboards. But, to instead focus on creating an open-source project which encouraged collaborative to derive some creative and functional ideas. And, that's precisely what this project became; we have contributors from Spain, Poland, India, and various places in the U.S. who came together to create something useful and meaningful. Furthermore, the site has accumulated over 10k visits as shown by web analytics. And, the project is still being maintained and improved upon, thanks to the help of developers.

Attribution
Technology
This project began with some very simple Python + Pandas private Jupyter notebooks, and the use of Plotly, "the leading front-end for ML & data science models in Python, R, and Julia." Django. But we needed a way for this to be accessible to the public therefore I started using the Django Python web-framework, Django is a high-level Web framework that encourages rapid development and clean, pragmatic design. To bootstrap the initial dashboard grid we used Appseed and Bootstrap 4 to fill-in where we needed custom UI elements.
Datasets
A large portion of the data we comes from one of the original data repositories tracking COVID-19 cases, Johns Hopkins University: CSSE 2019-ncov data repository. Additional data collected from Our World in Data: OWID's GitHub data repository. Lastly, to fill in some requirements we retrieved data for daily cases from New York Times' COVID GitHub data repository, found here.
Getting Started (for devs)
Get the project installed and running locally in just a couple quicky and easy steps. First, create a personal Fork of this repository. Then git Clone using your local terminal to a preferred location, and cd into the project.
- Create & activate virtual environment
python -m venv env

source env/bin/activate  # Linux/Mac
env/Scripts/activate # Windows- Install dependencies
pip install -r requirements.txt- Run local server, and DONE!
python manage.py runserver

May 06, 2020 - 11:22:23
Django version 3.0.6, using settings 'core.settings'
Starting development server at http://127.0.0.1:8000/
Quit the server with CONTROL-C.
Reading data locally
You can go through all the available datasets by going into the /processdata directory, launching a interactive python shell, importing getdata file, and calling any function.
cd covid19-dashboard/processdata$ python
>>> import getdata
>>> getdata.realtime_growth()
Confirmed Deaths Recovered
Date
1/22/20 555 17 28
1/23/20 654 18 30
... ... ... ...
8/2/20 18079723 689362 10690555
8/3/20 18282208 693694 10913000
[195 rows x 3 columns]Deployment
Heroku app is already configured to this repository for automatic deploys from any push to the master branch. Create a pull request containing your respective changes and wait for merge, where there is also a hybrid of Travis CI and Heroku CI in place for checking and testing changes in pull requests.